
Storm sewer installation is the process of constructing an underground or surface conveyance system that captures stormwater runoff and routes it to an approved outfall, detention basin, or retention facility. Done right, it protects property, prevents flooding, and keeps projects compliant with federal and local regulations. Done wrong, it creates costly failures that are expensive to diagnose and even more expensive to fix.
Here is the fast-decision checklist for each audience:
- Property owners: Confirm local permits, easements, and whether a licensed PE is required for your jurisdiction before signing any contract.
- Contractors: Verify the approved construction plans, soils report, and pipe material specifications before mobilizing equipment.
- Municipal planners: Confirm NPDES/MS4 permit conditions, local stormwater ordinances, and standard specification compliance (ASTM, AASHTO, or local standard plans) before issuing a notice to proceed.
Barnhart Excavating has managed this full sequence, from permit coordination through final CCTV acceptance, on commercial and municipal projects across the region for over 80 years.
Table of Contents
- What is a storm sewer, and how does it differ from a storm drain?
- How do engineers size a storm sewer system?
- Which pipe material is right for your project?
- How to install a storm sewer: the step-by-step sequence
- What are the OSHA and inspection requirements for storm sewer trenches?
- What permits and standards apply to U.S. storm sewer projects?
- What does storm sewer installation cost, and how long does it take?
- How do you maintain a storm sewer and fix problems when they arise?
- What does a quality-control checklist look like for storm sewer installation?
- Key Takeaways
- What contractors actually prioritize on storm sewer jobs
- Barnhart Excavating brings 80+ years of storm sewer expertise to your project
- Useful sources
- FAQ
What is a storm sewer, and how does it differ from a storm drain?
A storm drain is the surface intake point, the curb inlet, catch basin, or grated opening that collects runoff from streets, parking lots, and yards. A storm sewer is the conduit system that carries that collected water from the drain to its destination. The two terms are often used interchangeably in conversation, but on construction plans and in contract documents, the distinction matters.
System components
A complete drainage system installation typically includes:
- Inlets and catch basins: Surface collection points, often with a sump to capture sediment before it enters the pipe.
- Pipes: The primary conveyance element, ranging from 12-inch laterals to 72-inch or larger trunk mains.
- Manholes and junction boxes: Access structures for inspection, cleaning, and flow direction changes.
- Outfalls and headwalls: The discharge point where the system releases water to a receiving channel, pond, or waterway.
- Detention and retention structures: Basins that hold runoff temporarily (detention) or permanently (retention) to control peak discharge rates and improve water quality.
Types of systems
Closed conduit systems use buried pipe and are the standard for urban and suburban development. They handle high volumes efficiently and protect water quality by keeping runoff contained until it reaches the outfall.
Open channel systems use swales, ditches, or lined channels. They are common in rural areas, along highway rights-of-way, and where land is available for grading. Maintenance access is easier, but they require more land area and careful erosion control.
Municipal Separate Storm Sewer Systems (MS4) are publicly owned networks that collect and convey stormwater separately from sanitary sewage. The EPA's NPDES program regulates MS4 operators and requires permits that set discharge limits, inspection schedules, and public education requirements.
Combined sewer systems carry both stormwater and sanitary sewage in a single pipe. Older cities, particularly in the Northeast and Midwest, still operate combined systems. During heavy rain events, these systems can overflow, releasing untreated sewage. New combined sewer construction is essentially prohibited under current EPA policy; any new project in the U.S. will be a separate system.
Public vs. private responsibility
Public mains typically run under streets and public rights-of-way, maintained by the municipality. Private laterals connect private property to the public main, and maintenance responsibility falls on the property owner up to the connection point. Knowing exactly where that boundary sits before design begins prevents disputes during construction and long after.
How do engineers size a storm sewer system?
Designers size storm sewers by first calculating peak runoff (hydrology) and then selecting a pipe diameter and slope that can convey that flow without surcharging (hydraulics). These two steps are sequential and non-negotiable.

Hydrology inputs
Peak runoff depends on four variables: rainfall intensity, drainage area, runoff coefficient, and time of concentration.
- Rainfall intensity (IDF curves): Engineers pull intensity-duration-frequency data from local IDF curves, typically published by state DOTs or NOAA. A 10-year, 24-hour storm is a common design standard for minor systems; major systems often use a 100-year event.
- Runoff coefficient (C) or curve number (CN): Reflects how much rain becomes runoff. A parking lot might carry a C of 0.90; a grassy lawn, 0.25. The Rational Method (Q = CiA) is standard for drainage areas under 200 acres. TR-55 or regression methods apply to larger watersheds.
- Time of concentration: The time it takes runoff to travel from the hydraulically farthest point to the design point. Shorter times produce higher peak flows and require larger pipes.
- NPDES peak control: Many MS4 permits require that post-development peak discharge not exceed pre-development rates for specified storm frequencies. This often drives detention basin sizing, not just pipe sizing.
Hydraulics and Manning's equation
Once peak flow (Q) is known, Manning's equation determines whether a candidate pipe can carry it:
Q = (1.49/n) × A × R^(2/3) × S^(1/2)
Where n is the roughness coefficient (0.013 for concrete, 0.009–0.011 for smooth HDPE), A is the cross-sectional flow area, R is the hydraulic radius, and S is the pipe slope.
Minimum slope guidance: Most municipal specifications require a minimum slope that produces a self-cleaning velocity of at least 2 ft/s at design flow. For a 12-inch pipe, that typically means a slope of 0.5% or steeper. Flatter slopes allow sediment to accumulate and eventually block the system.
Quick sizing example: A 1-acre parking lot with C = 0.90, a 10-year rainfall intensity of 4 in/hr, and a time of concentration of 10 minutes produces a peak flow of Q = 0.90 × 4 × 1 = 3.6 cfs. A 15-inch RCP at 0.5% slope carries approximately 3.8 cfs at full flow, making it a reasonable candidate. A 12-inch pipe at the same slope carries roughly 2.2 cfs, which is insufficient. The engineer would confirm the 15-inch selection against velocity checks and available cover before finalizing.
Pro Tip: Always verify that the Manning's n value in your hydraulic model matches the actual pipe material being installed. Manufacturer literature sometimes uses best-case roughness values; field conditions with joints, sediment, and minor misalignment will produce higher effective roughness. Build in margin.
- Confirm IDF data source matches the project jurisdiction (state DOT or NOAA Atlas 14).
- Check minimum cover requirements for the selected pipe material before finalizing slope.
- Size detention basins using routed hydrographs, not just peak-flow comparisons.
Which pipe material is right for your project?
Material choice should be driven by structural loading, life-cycle risk, and site constraints, not by unit material price alone. The pipe that costs less per foot at the supplier can easily cost more per foot in the ground once you account for bedding, compaction testing, and deflection testing requirements.
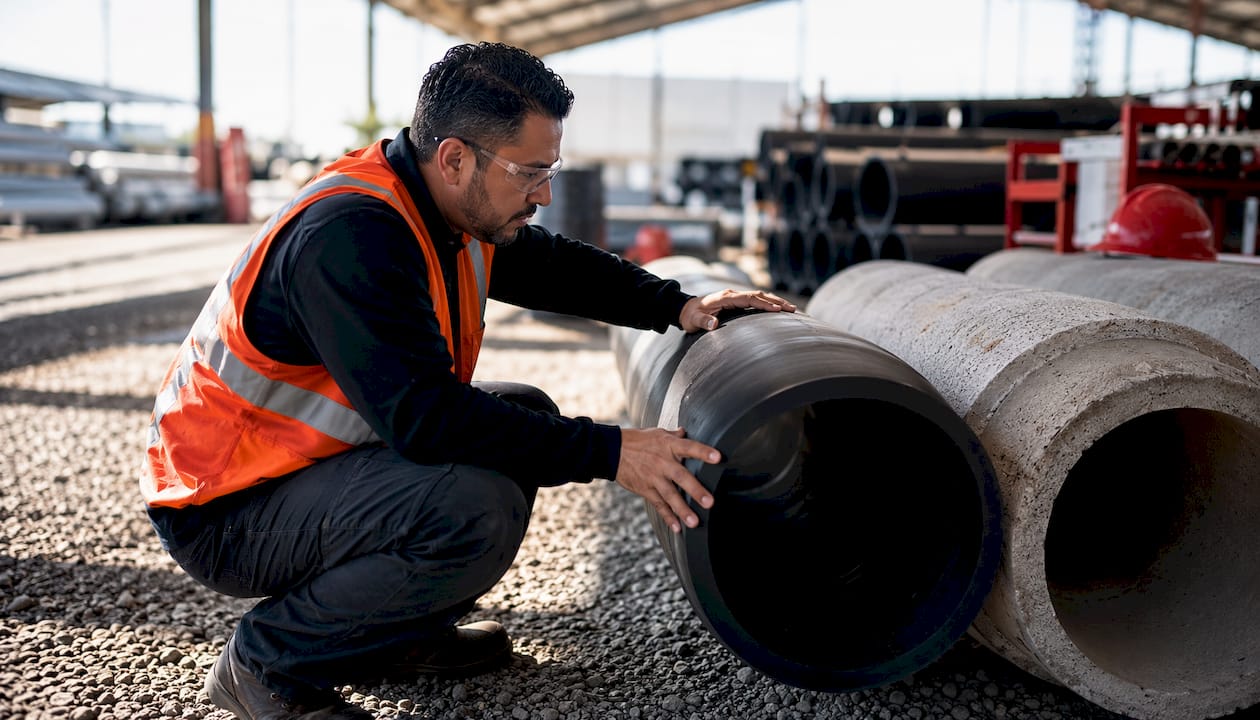
Common materials compared
| Material | Structural Behavior | Joint Type | Key Advantage | Key Risk | Traffic Loading |
|---|---|---|---|---|---|
| Reinforced Concrete Pipe (RCP) | Rigid; wall carries load | Rubber gasket or wrapped | Proven durability; no deflection testing required | Heavier; requires equipment for placement | Excellent under high fill or traffic |
| HDPE / HP Polypropylene | Flexible; soil carries load | Integral bell-and-spigot gasket | Lightweight; corrosion resistant | Requires precise engineered backfill and deflection testing | Good with proper installation |
| PVC (SDR or profile wall) | Flexible; soil carries load | Gasketed bell-and-spigot | Smooth interior; good hydraulics | Sensitive to UV and point loads; deflection testing required | Moderate; depth and cover limits apply |
| Corrugated Metal Pipe (CMP) | Semi-rigid | Lap band coupling | Low initial cost; easy to cut | Corrosion in acidic or high-sulfide soils; shorter service life | Good under moderate fill |
The installed-cost reality
Flexible pipe's lower purchase price is frequently offset by the cost of engineered granular backfill, staged compaction lifts, and mandatory deflection testing. On a project with poor native soils or high groundwater, the total installed cost of HDPE can meet or exceed RCP. Flexible pipe is highly sensitive to installation quality; improper compaction around the haunches or inadequate bedding leads to deformation that no amount of post-installation repair can fully correct.
RCP carries load through the pipe wall, so it is more forgiving of minor bedding inconsistencies. That structural certainty is why RCP remains the default specification on most municipal roadway projects and in jurisdictions with high traffic loading or deep cover requirements.
Pro Tip: When evaluating bids that propose substituting flexible pipe for RCP, ask the contractor to include the full cost of engineered backfill, compaction testing at the specified interval, and deflection testing in the comparison. The apparent savings often disappear.
Decision flow
- High traffic, deep cover, or poor soils: Specify RCP.
- Corrosive soils or tight hydraulic requirements: HDPE or PVC with full compaction and deflection testing.
- Temporary or low-fill applications: CMP may be acceptable, but confirm soil pH and service life expectations with the owner.
- Any flexible pipe: Budget for independent compaction testing and deflection testing as line items, not as incidentals.
How to install a storm sewer: the step-by-step sequence
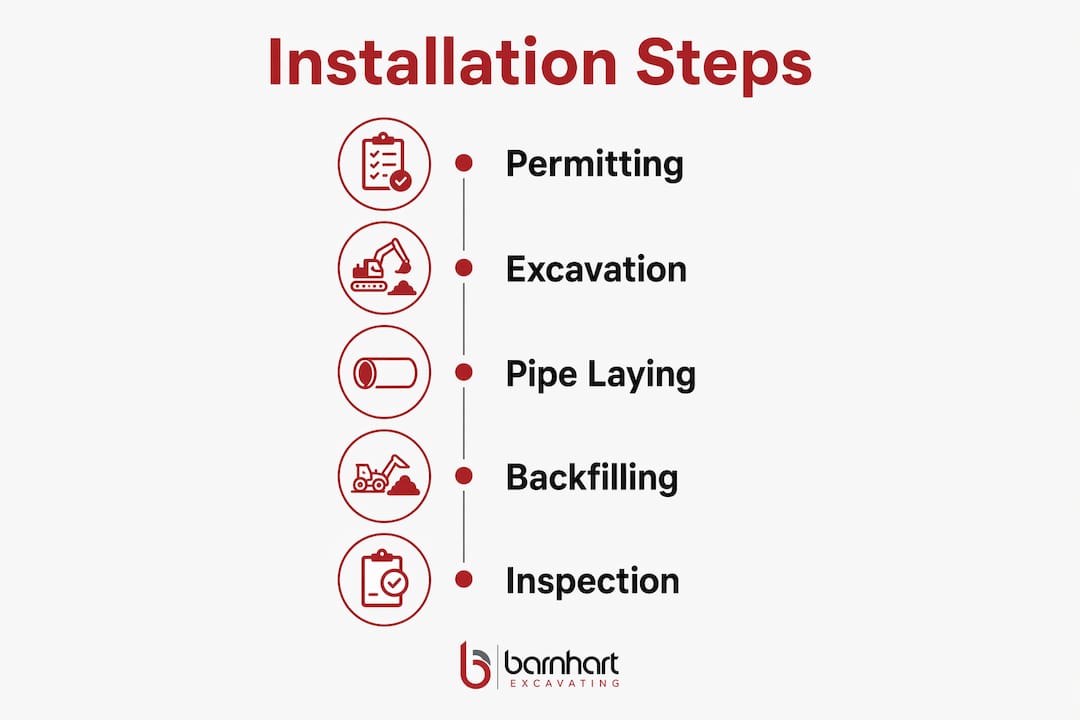
A repeatable installation sequence prevents rework. The canonical order is: site prep → trenching → bedding → pipe laying → jointing → structures → backfill/compaction → testing → commissioning. Deviating from this sequence, even under schedule pressure, is the leading cause of post-installation failures.
Installation steps
-
Mobilization and site protection. Establish staging areas, install temporary erosion and sediment controls (silt fence, inlet protection, construction entrances), and confirm utility locates are complete. No trench opens until all underground utilities are marked and cleared.
-
Temporary erosion control. Install and inspect BMPs before any ground disturbance. Many NPDES construction permits require a Stormwater Pollution Prevention Plan (SWPPP) to be on site and current before work begins.
-
Trenching and sheathing. Excavate to design line and grade. Trench width should be the minimum necessary for safe worker access and proper compaction around the pipe. Where groundwater or unstable soils are present, dewatering with well points or pumps is required to maintain a workable trench bottom. Never lay pipe in standing water or on saturated bedding.
-
Bedding and haunching. Place a minimum 4-inch layer of granular bedding material, uncompacted, to provide uniform support along the full pipe barrel. Hand-excavate bell holes under each bell-and-spigot joint so the barrel bears continuously on the bedding, not on the bell. This step is frequently skipped under schedule pressure and is one of the most common causes of long-term misalignment.
-
Pipe placement and jointing. Begin at the outlet and work upstream, laying the groove or bell end pointing upstream. Use a pipe laser to maintain design line and grade continuously. Clean all joint surfaces before assembly, apply manufacturer-specified lubricant to gaskets, and assemble joints per manufacturer recommendations. Joint openings on RCP should not exceed 1/2 inch on the inside or outside of the pipe.
-
Manholes and inlets. Install structures at the locations and elevations shown on the approved plans. Cut pipe flush with the inside wall of each structure using a saw, not a hammer. Confirm invert elevations before backfilling around structures.
-
Backfill and compaction. Place backfill in lifts, typically 6–8 inches compacted depth, and compact each lift to the specified density. Most municipal specifications require Standard Proctor compaction with moisture control near optimum levels. Independent compaction testing at regular intervals or at each structure is increasingly standard.
-
CCTV and deflection testing. After backfill is complete but before final restoration, run a CCTV inspection of all installed pipe to confirm alignment, joint integrity, and absence of debris or infiltration. For flexible pipe, perform a go/no-go mandrel deflection test to confirm the pipe has not deformed beyond the allowable limit (typically 5% of the nominal diameter).
-
Final restoration and commissioning. Restore pavement, seeding, or surface treatment per the contract documents. Remove temporary erosion controls only after the site is stabilized. Deliver all test reports, compaction records, and CCTV footage to the owner or engineer of record.
Typical timeline by project scale
- Small private lateral: Design and permitting take several weeks; construction and inspection periods vary accordingly.
- Commercial site main: Design and permitting require multiple weeks; construction and testing periods vary accordingly.
- Municipal roadway retrofit: Design and permitting typically take several months; construction and inspection periods vary accordingly.
Rock excavation, high groundwater, and utility conflicts are the three most common schedule impacts. Budget time for each in the project schedule before committing to a completion date.
What are the OSHA and inspection requirements for storm sewer trenches?
Trench safety and protective systems are mandatory, not optional. OSHA 29 CFR Part 1926 Subpart P governs all excavation work on storm sewer projects and sets specific requirements based on trench depth and soil classification.
Key OSHA requirements
- Protective systems are required in any trench 5 feet or deeper, and in shallower trenches where a competent person determines conditions are unsafe.
- Sloping requires cutting trench walls back at an angle that depends on soil type: 3/4:1 (H:V) for Type A soils, 1:1 for Type B, and 1.5:1 for Type C.
- Benching is an alternative to sloping for stable soils, using stepped horizontal cuts.
- Shoring and trench boxes provide physical support without requiring wide trench cuts, which is the preferred method in urban environments where space is limited.
- A competent person must inspect the trench before workers enter, after any rain event, and at the start of each shift.
Inspection and testing requirements
Acceptance testing is not optional on any project that will be accepted by a public agency or that involves flexible pipe. The municipal sewer inspection process typically requires advance notification to the engineer or inspector before each hold point.
Required tests and documentation:
- Compaction/density tests: Independent testing at 250-foot intervals or at each structure, targeting 95% Standard Proctor. Results must be documented and submitted before payment.
- Deflection testing: Mandrel test for flexible pipe within 30 days of installation to allow for initial soil settlement.
- CCTV inspection: Full-length video of all installed pipe, with a written report identifying any defects, joint offsets, or infiltration.
- Joint integrity: Visual inspection during installation and confirmation that joint gaps do not exceed specification limits.
Pre-backfill safety and inspection checklist
- Trench walls sloped, benched, or shored per OSHA Subpart P.
- Competent person has inspected and signed off on trench conditions.
- Bedding placed and bell holes hand-excavated.
- Pipe laid to design line and grade, confirmed with laser.
- All joints cleaned, lubricated, and assembled per manufacturer specs.
- Engineer or inspector has signed the hold-point log before backfill begins.
- Dewatering active and trench bottom dry.
What permits and standards apply to U.S. storm sewer projects?
Obtain local permits and PE-stamped plans before breaking ground. That sequence is not negotiable on any project that connects to a public system or crosses a public right-of-way.
Typical required approvals
- Local public works or engineering permit: Required for any work in a public right-of-way or connecting to a public storm sewer main. The issuing authority varies by jurisdiction (city, county, or state DOT).
- Right-of-way or easement permits: Required when the installation crosses or occupies land not owned by the project owner. Confirm easement language covers the proposed pipe size and depth.
- NPDES/MS4 stormwater permit: Required for construction sites disturbing one acre or more under the EPA's NPDES stormwater program. Many states administer their own NPDES programs with additional requirements.
- Construction permit: Most municipalities require a separate building or construction permit for underground utility work, independent of the right-of-way permit.
- PE-stamped drawings: Required by most jurisdictions for any system connecting to a public main, any project above a certain pipe diameter or depth, and all projects on public property. Confirm the specific threshold with the local authority having jurisdiction (AHJ).
Standards and specifications to reference
- ASTM International: Pipe material standards (ASTM C76 for RCP, ASTM F2306 for HDPE, ASTM D3034 for PVC).
- AASHTO: Structural design and material standards widely referenced in state DOT specifications.
- Local standard plans: Most cities and counties publish standard construction details for inlets, manholes, pipe bedding, and outfalls. Always request the current edition before design begins.
- Municipal specifications: Documents like the Pueblo 2026 revisions, the City of Galveston specification 02720, and the City of Columbia standards manual provide jurisdiction-specific material lists, testing requirements, and pay-item structures.
Permit timing
Small private projects may receive permits in 2–4 weeks. Municipal or roadway projects with NPDES coverage and multiple agency reviews commonly take 3–6 months. Build permit lead time into the project schedule from day one, not after design is complete.
Permit checklist for municipal projects:
- Local public works permit application submitted with PE-stamped plans.
- NPDES construction general permit (CGP) coverage obtained or verified.
- Right-of-way or easement documentation confirmed and recorded.
- Utility conflict review complete (one-call notification and potholing where needed).
- MS4 operator notified if connecting to a regulated municipal system.
What does storm sewer installation cost, and how long does it take?
Soil conditions, depth, pipe material, and testing requirements drive most of the cost and schedule on a drainage system installation. The pipe itself is often a minority of the total installed cost once excavation, shoring, bedding, compaction testing, and restoration are added.
Cost drivers
- Pipe type and size: Larger diameters cost more per linear foot for material and require wider trenches and heavier equipment. RCP is typically priced higher per foot than HDPE or PVC at the supplier, but the installed-cost gap narrows or reverses with flexible pipe's testing requirements.
- Excavation depth: Deeper trenches require more shoring, more backfill material, more compaction lifts, and more time. Rock excavation is typically a separate bid item and can multiply excavation costs significantly.
- Shoring and dewatering: In urban environments or areas with high groundwater, shoring and dewatering can represent a substantial share of total project cost.
- Traffic control: Work in active roadways requires lane closures, flagging, and sometimes detour signing, all of which add cost and extend schedule.
- Manholes and inlets: Structures are typically bid as separate pay items from the pipe, and each one adds material, labor, and inspection time.
- Bedding and granular backfill: Engineered granular material costs more than native soil and must be hauled in if native material does not meet specification.
- Compaction testing: Independent testing fees are a real line item. Budget for testing at the intervals your specification requires.
- Restoration: Pavement replacement, seeding, and surface restoration can equal or exceed the cost of the pipe installation itself on urban projects.
- Design and permitting fees: PE design, permit fees, and inspection fees are indirect costs that owners sometimes underestimate. On smaller projects, these can represent 15–25% of total project cost.
- Contingency: Budget a contingency of at least 10–15% for unforeseen conditions, particularly on projects with limited subsurface investigation.
Timeline by project scale
| Project Type | Design & Permitting | Construction | Inspection & Closeout |
|---|---|---|---|
| Small private lateral (<200 LF) | 2–6 weeks | 1–3 days | 1 week |
| Commercial site main (200 LF) | 4–12 weeks | 1–3 weeks | 1–2 weeks |
| Municipal roadway retrofit (over 200 LF) | 3–6 months | 4–12 weeks | 2–4 weeks |
Schedule inspections as hold points in the construction schedule, not as afterthoughts. An inspector who cannot respond within 24 hours of a hold-point notification can delay backfill by a full day or more on a fast-moving project.
How do you maintain a storm sewer and fix problems when they arise?
Scheduled cleaning, periodic CCTV inspection, and prompt attention to joint infiltration prevent the large majority of storm sewer failures. Systems that go years without inspection tend to fail at the worst possible time, during a major storm event.
Maintenance schedule
- Annual cleaning: Vacuum or jet-clean inlets, catch basins, and accessible pipe sections to remove sediment and debris. High-debris areas (near construction sites or heavy leaf fall) may need cleaning twice per year.
- CCTV inspection every 3–5 years: For systems in high-traffic or high-debris areas, video inspection on a regular cycle catches problems before they become failures. Municipal systems often follow a formal asset management program with defined inspection intervals.
- Inlet and manhole inspection: Check frames, grates, and covers annually for damage, displacement, or corrosion. A displaced grate is a safety hazard and a direct pathway for debris to enter the system.
Common failure modes
- Undermining from poor compaction: Voids beneath the pipe or around structures allow soil migration, which leads to surface settlement and, eventually, pipe collapse. This is almost always traceable to inadequate compaction during installation.
- Joint infiltration: Groundwater entering through failed joints carries fine soil particles into the pipe, creating voids in the surrounding soil. CCTV inspection identifies joint offsets and failed gaskets before they become sinkholes.
- Corrosion: CMP and some older concrete pipes are vulnerable to corrosion in acidic or high-sulfide environments. Inspect for wall loss and pitting during CCTV runs.
- Sediment buildup: Flat slopes or undersized pipes accumulate sediment that reduces capacity and eventually blocks flow. Regular cleaning is the only mitigation.
Rehabilitation options
Spot repair is appropriate for isolated joint failures, cracked sections, or localized corrosion. It is the least disruptive option when the surrounding pipe is in good condition.
Cured-in-place pipe (CIPP) lining installs a resin-impregnated liner inside the existing pipe, restoring structural integrity and hydraulic capacity without excavation. CIPP is cost-effective for long runs of deteriorated pipe where the host pipe is still structurally sound enough to support the liner.
Sliplining inserts a smaller-diameter pipe inside the existing host pipe. It is less expensive than CIPP but reduces the internal diameter and hydraulic capacity, so it requires a hydraulic check before specification.
Full replacement is warranted when the host pipe has collapsed, when the pipe is structurally compromised over a long run, or when the system needs to be upsized to handle increased runoff from development.
Pro Tip: When budgeting for rehabilitation, get a CCTV run before committing to a method. A video inspection that costs a few hundred dollars can prevent specifying a $50,000 CIPP lining on a pipe that actually needs full replacement, or vice versa.
What does a quality-control checklist look like for storm sewer installation?
Consistent QC, specifically proper bedding, hand-excavated bell holes, staged compaction, and independent testing, prevents the large majority of post-installation claims. The checklist below is organized by work phase so field supervisors and owners' representatives can use it as a live document during construction.
Preconstruction verification
- Approved PE-stamped plans on site and current.
- All permits obtained and posted.
- Utility locates complete; conflicts resolved or documented.
- Pipe materials received, inspected, and confirmed against specification.
- Compaction testing firm engaged and schedule confirmed.
Trench and bedding acceptance
- Trench excavated to design line and grade; bottom stable and dry.
- Shoring or sloping in place per OSHA Subpart P.
- Granular bedding placed at minimum 4-inch depth, uncompacted.
- Bell holes hand-excavated at each joint location.
- Engineer or inspector sign-off on bedding before pipe placement.
Pipe laying and jointing acceptance
- Pipe laid from outlet, proceeding upstream, with bell end pointing upstream.
- Laser-controlled line and grade confirmed at each joint.
- Joint surfaces cleaned; gaskets lubricated per manufacturer specs.
- Joint gaps within specification limits (no more than 1/2 inch for RCP).
- Pipe interiors kept clean; open ends plugged when work stops.
Backfill compaction recordkeeping
- Backfill placed in 6–8 inch compacted lifts.
- Independent compaction tests at 250-foot intervals or at each structure.
- Test results documented and submitted to engineer before payment.
- 95% Standard Proctor (AASHTO T99) confirmed at each test location.
Testing and final documentation
- Deflection mandrel test completed for all flexible pipe within 30 days of installation.
- CCTV inspection completed; report delivered to owner/engineer.
- All test reports, compaction records, and as-built drawings compiled and submitted.
- Final walkthrough with owner's representative completed and documented.
Common mistakes and how to avoid them
- Over-widened trench: Wider trenches require more backfill and make proper compaction around the haunches harder to achieve. Specify and enforce minimum trench widths.
- Insufficient haunching: Leaving voids under the pipe haunches is the single most common installation defect on flexible pipe. Require hand-tamping or mechanical compaction in lifts below the pipe springline.
- Skipping independent compaction tests: Self-reported compaction by the installing contractor is not the same as independent testing. Require a third-party testing firm on any project that will be accepted by a public agency.
- Improper joint cleaning: Dirt or debris on joint surfaces prevents gaskets from seating correctly, leading to infiltration and joint offsets over time.
Barnhart Excavating's field teams follow a documented QC protocol on every storm sewer project, with hold-point sign-offs at bedding acceptance, pipe-laying acceptance, and compaction testing before any backfill proceeds. That documentation record protects the owner, the engineer, and the contractor when questions arise after project closeout.
Pro Tip: Require the contractor to maintain a daily QC log that records trench conditions, bedding placement, pipe placement, joint assembly, and compaction test results. A complete log is the fastest way to resolve any post-installation dispute and is often required for final payment on public projects.
Key Takeaways
Proper storm sewer installation requires PE-stamped design, OSHA-compliant trench safety, documented compaction testing, and material selection based on total installed cost, not just material price.
| Point | Details |
|---|---|
| Design before you dig | PE-stamped plans and confirmed permits must be in hand before any excavation begins. |
| OSHA compliance is mandatory | Trenches 5 feet or deeper require sloping, benching, or shoring per 29 CFR Part 1926 Subpart P. |
| Installed cost beats material cost | Flexible pipe's lower purchase price often disappears once engineered backfill, compaction testing, and deflection testing are included. |
| Independent testing protects everyone | Compaction tests at 250-foot intervals targeting 95% Standard Proctor, plus CCTV and deflection testing, are the standard for public acceptance. |
| Barnhart Excavating | Barnhart Excavating manages the full installation sequence, from permit coordination through CCTV acceptance, on commercial and municipal projects. |
What contractors actually prioritize on storm sewer jobs
The design drawings tell you what to build. What they do not tell you is how much the outcome depends on decisions made in the first hour on site.
Before any pipe goes in the ground, the most experienced crews spend time on two things: confirming the trench bottom is exactly where the plans say it should be, and making sure the bedding is right. Not close. Right. A quarter-inch of grade error at the outlet compounds over a 500-foot run into a slope problem that no amount of compaction testing will fix. That is the kind of thing you only learn by doing it, and by fixing it when it goes wrong.
Coordination is the other variable that separates a smooth project from a painful one. Utility conflicts, inspector availability, and material delivery windows all have to line up. When they do not, the temptation is to push ahead and deal with the paperwork later. That is exactly when mistakes happen. Barnhart Excavating's approach has always been to build the schedule around the inspection hold points, not around the equipment availability. It takes more planning up front, but it eliminates the rework that kills project margins and damages client relationships.
The projects that close cleanly are the ones where the QC documentation was treated as seriously as the physical work. Test reports, compaction records, CCTV footage, and as-built drawings are not administrative overhead. They are the proof that the job was done right, and they are what protects everyone when questions come up six months after the last truckload of asphalt.
Barnhart Excavating brings 80+ years of storm sewer expertise to your project
When a storm sewer project needs to be done right the first time, Barnhart Excavating delivers the full scope: trenching, shoring, bedding, pipe installation, structure placement, compaction testing coordination, and final restoration. With over 80 years of experience in underground utility installation and earthwork, Barnhart brings the accountability and field discipline that complex drainage projects demand.

From permit coordination through CCTV acceptance, Barnhart Excavating manages every phase with documented QC hold points and clear communication at every step. Whether you are a developer breaking ground on a new commercial site, a general contractor managing a municipal retrofit, or a property owner navigating a drainage problem, Barnhart has the utility installation experience and the track record to deliver. View completed storm sewer and utility projects or contact Barnhart Excavating directly to request an estimate for your project.
Useful sources
The standards and specification documents below are the primary references for the technical claims in this guide. Use the permit-submittal column to determine which documents your reviewing agency is most likely to require.
| Document | Issuing Authority | Primary Use |
|---|---|---|
| 29 CFR Part 1926 Subpart P | OSHA | Trench safety compliance; required for all excavation work |
| NPDES Stormwater Construction General Permit | U.S. EPA | Permit submittal for sites disturbing 1+ acre |
| ASTM C76 / F2306 / D3034 | ASTM International | Pipe material specification and submittal |
| AASHTO T99 (Standard Proctor) | AASHTO | Compaction testing standard; referenced in most municipal specs |
| Article 12 Storm Sewers (Pueblo 2026 revisions) | City of Pueblo, CO | Field execution; compaction and deflection testing criteria |
| Storm Drain and Sanitary Sewer Standards (City of Columbia, Jan. 2025) | City of Columbia, MO | Field execution; bedding, bell holes, dewatering requirements |
| 02720 Storm Sewers (City of Galveston) | City of Galveston, TX | Pay-item structure; field execution reference |
| Section Storm Sewers (Iowa DOT, Oct. 2025) | Iowa DOT | Pipe installation sequence, jointing, and measurement |
| Storm Sewers (MDOT Wiki) | Michigan DOT | Bedding depth, laser grade, and pipe-laying sequence |
For permit submittals, lead with the OSHA standard, your state's NPDES CGP, and the local municipality's standard plans. For field execution, the City of Columbia manual and the Pueblo 2026 revisions provide the most detailed bedding, compaction, and testing language.
FAQ
What is a storm drain in the U.S.?
A storm drain is the surface inlet, such as a curb inlet or catch basin, that collects runoff from streets and property. The storm sewer is the underground pipe system that carries that collected water to an outfall, detention basin, or other approved discharge point.
What is the minimum slope for a storm sewer?
Most U.S. municipal specifications require a minimum slope that produces a self-cleaning flow velocity of at least 2 ft/s. For a 12-inch pipe, that typically means a slope of 0.5% or steeper, though the exact minimum varies by jurisdiction and pipe diameter.
How much does it cost to install a storm drain?
Storm sewer installation costs vary widely based on pipe size, depth, soil conditions, and restoration requirements. Pipe is typically bid by the linear foot, with separate pay items for manholes, inlets, rock excavation, and surface restoration. Design fees, permits, and independent testing add indirect costs that can represent 15–25% of total project cost on smaller jobs.
Are combined sewer systems still being used in the United States?
Older cities, particularly in the Northeast and Midwest, still operate combined sewer systems that carry both stormwater and sanitary sewage. New combined sewer construction is effectively prohibited under current EPA policy; all new U.S. projects are built as separate storm and sanitary systems.
When should you hire a professional contractor for storm sewer work?
Hire a licensed contractor with documented underground utility experience for any project connecting to a public system, crossing a right-of-way, or requiring OSHA-compliant trenching deeper than 5 feet. Ask for references on similar projects, proof of insurance, and a written QC plan that includes compaction testing and CCTV inspection as standard deliverables.